Tag Archives: gross dissection

Gross Dissection

Gross dissection covers a wide variety of tasks that are performed in medical labs which ranges from removal of surgical samples from a patient to slicing up a needle core biopsy. When I was working for an oncology lab, the dissection I routinely performed was on small surgical samples that arrived in formalin.

The lab I worked in received samples from all over the world. Sometimes they came from a hospital that had a tissue processor and an embedding station. These tissue samples were already in a paraffin cassette and required nothing further in preparation of microtomy. Some of the odder samples we received were processed tissue in a square block of paraffin, large pre-cut tissue (for larger plastic cassettes), and whole organs or huge amounts of fatty tissue in large formalin vials.

We received tissue in this style of vial filled with 30:1 formalin to tissue ratio

Gross dissection is really the first thing that needs to occur to a tissue sample before we can process it through the lab. Without the tissue going through a tissue processor, which removes most of the water out of the sample, we can not cut it up or run any tests on it. So, I volunteered to be the person that came in on the weekends to gross the surgical samples we received.

The first step is looking at the pathology report to determine what part of the body the tissue came from. This information may help us determine how to section the tissue if it is too large to fit in one of our paraffin molds. The next step is measuring the dimensions of the tissue and determining where the tumor is. The major idea behind gross dissection for our purposes, is to expose the largest area possible so we have a lot of tissue to look over during the immunohistochemical (IHC) tests.  The last step is determining if it needs to be bisected, trisected, loafed, or many other forms of further cutting.

The tissue goes in the center of the plastic cassette and the lid is then closed to prepare the sample for tissue processing

During the measuring and cutting process, we had to take extremely detailed notes on what color the tissue was, it’s dimensions, all the personal identifying writing on the formalin vial, and how it was cut and placed in x number of plastic cassettes. Once those notes were good, we would place all of our tissue cassettes into a tissue processor, dry out the tissue, and then embed it in paraffin using the right sized mold for the tissue. Most modern day labs all use formalin fixed paraffin embedded (FFPE) blocks for microtomy. It’s really the industry standard, and it is what I have the most experience with.

This is what a typical plastic cassette with processed tissue embedded in paraffin looks like

Cytology Specimens for Theragnostic Cancer Treatment

I was always looking at learning how to do new techniques and operate new machinery while I was working at Caris Lifesciences. The projects that take you out of the repetitive daily tasks were what I lived for. Cytology was a great skill to learn.

I was approached about how I would feel about learning how to process fluid specimens during grossing, or cytology. Since this was something new, I wanted to see how it went. We were going to receive all types of bodily fluids, most of them containing blood, but not necessarily always.

The process wasn’t super complicated, but there were a lot more manual steps involved than simply putting tissue in a tissue processor.

It involved pipetting the blood into smaller vials. These vials were then placed in a centrifuge, spun down, and had the supernatant pipetted off the top, and then spun down more to form a pellet.

cytology
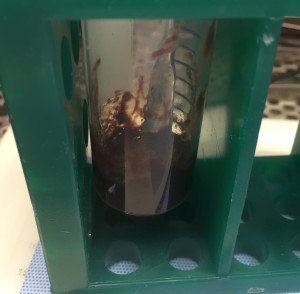
A bloody fluid sample on its way to becoming a pellet in a centrifuge tube

The idea was to get as much of the fluid out as possible. This process continued until a satisfactory pellet was made.

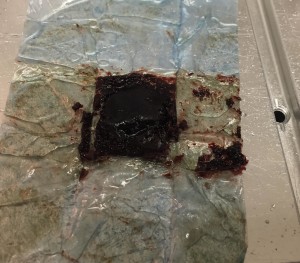
The pellets were then combined and heated agarose gel was added to the cell pellet. The agarose infused cells were then wrapped in lens paper and stuck in the tissue processor to further desiccate the sample. After tissue processing, it was embedded in paraffin and cut on a microtome like any other sample.

cytology
A processed cytological specimen sitting on a hotplate ready for FFPE block construction

With all the steps, these samples could take anywhere from 45 minutes to a few hours depending on the quality of the fluid being sent in. If it wasn’t fresh, it was hard, and if it had formalin in it, more centrifuging was required.

I was the only person, besides the lab director, who was responsible for doing these samples. It was a responsibility I gladly accepted, plus if one of these cytology samples came in on a weekend (which I volunteered to work), I would have to process them anyway. I did so with little supervision or training, but just followed the assay and everything came out well each time. Most of the specimens I handled yielded good molecular data later down the process line.