Tag Archives: Laboratory

Tissue Embedding

Tissue embedding is a pretty simple task. Processed tissue is placed in a mold and paraffin is then drizzled on top of it. A plastic cassette is then placed on top of the mold and it’s set on a cold plate to cool. This creates the formalin fixed paraffin embedded (FFPE) block. These are the common standard used in all of histology. If a portion of tissue is too large for biggest mold, gross dissection of the sample is required.

This was one of my tasks when I would come into the lab on the weekend to gross the saturday samples. Sometimes we would receive samples that were already tissue processed, but received in a very large cassette, or stuffed with too much tissue for the mold they used. In this case, the FFPE block would be melted down and the tissue sectioned so it fit into one of our molds.

When performing microtomy, sometimes the tissue would pop out of the block, crack, have bad paraffin quality, or any number of things that inhibited cutting. The block would then be re-embedded using our embedding station, logged, and then sectioned with better results. This was also necessary if the tissue was on an odd plane, or one portion of the tissue was embedded further into the paraffin than the section that is hitting the microtome  blade.

tissue embedding
Tissue-Tek embedding center that I’m familiar with

When I was making Tissue Micro Arrays (TMA), I would make 100 blocks at a time using this station. It was quite tedious, and getting the paraffin to properly fill the back of the plastic cassette was hard. It is necessary to get enough paraffin the back to avoid over punching the block or having the paraffin break off while performing microtomy.

Slides: Organization Distribution and Filing

An often overlooked and very necessary part of the lab is storing specimens. This was the job of the laboratory aides in the lab that I worked in. It takes a tremendous amount of time to make an efficient system for dealing with the flow of specimens we received while working at the lab at Caris Lifesciences.

The organization flow started when the specimen entered the company where it was given a case number. This number was used for all of the logging that occurred when the specimen passed through all the steps up to the case report. At any time, we could track where a case was based on the fastidious logging at each station.  Because the life of someone is on the line, these logging steps prevent the mix up of tissue from one patient to the next. There are also a lot of auditing that goes on to make sure everything was where it should be. The laboratory information system (LIS) and sharepoint were some of the tools used for data logging and mining.

slide organization distribution filing
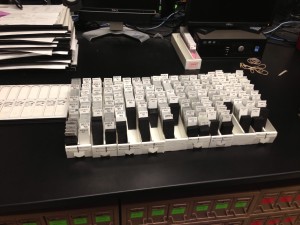
Slides filed by case number in a temporary cardboard container

The lab aide spent most of their time moving slides around the laboratory. This distribution is key to efficient turn around time (TAT). We prided ourselves at Caris, that we could get a specimen in, and provide all the work required to make a good therapy regime,  with a window of only 7 days or less. If all of the machines were operating and there were no holdups, this happened most of the time. Sometimes machines would go down or an antibody would not work properly, which would really slow the process down. At this point, the organization and distribution of the slides are key to making sure that everything gets done in the order it is suppose to.

Gel Electrophoresis

I took a molecular biology course when I was attending Minnesota State University: Moorhead (MSUM). It was the first course I took that required extensive laboratory time. I was a great introduction to some of the common laboratory techniques including gel electrophoresis.

Gel Electrophoresis
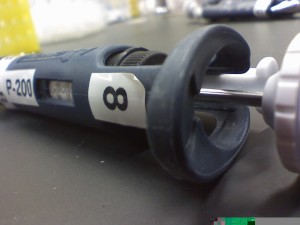
A micro pipette

We went through all the steps from making agarose to micro pipetting a ladder into the wells. We ran a lot of assays and were required to take extensive notes. It was a really great experience, and my favorite laboratory course I’ve taken.

Gel Electrophoresis
Filling the wells of a gel paying very close attention to not puncture the agarose with the very pointy tip of the micro pipette

To make the agarose we measured out gelatin powder mixed it with water and microwaved it. This acts as the matrix for which the DNA must travel. The matrix slows down larger sections first, and those bands show up closer to the wells, while the shorter snippets travel further down the agarose matrix. Once the gel is made, it’s placed in a device that electrifies the gels which draws the DNA through the gel (see image above).

Gel Electrophoresis
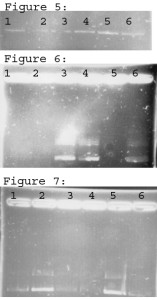
Sometimes things don’t go as well as planned and need to be rerun, which I imagine was the case with this experiment

Most of the assays we performed required that we test it by running a gel and photographing it and running analysis based on how it fluoresced. This was essential when we were running PCR (polymerase chain reaction) to amplify snippets of DNA to make sure we amplified the section we were seeking.

Gel Electrophoresis
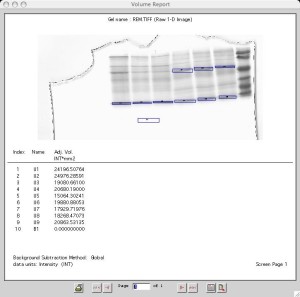
Here you can see an analysis of strand length based on the ladder, which is the dark bands on the right hand side of the image


Anti-Body Dilution Preparation

Diluting a solution is pretty easy. Usually you are taking a stock solution and adding a buffer or other solution to it to get the required dilution. The math is rather simple here as well.

 C_1\times V_1 = C_2\times V_2

Where:

C_1 = Initial concentration or molarity.
V_1 = Initial volume.
C_2 = Final concentration or molarity.
V_2 = Final volume
If math isn’t your strong suit, you can always use an online calculator to find volume of solution you need for your dilution.
When doing anti-body dilutions for IHC tests, everything is measure in micro liters (μL) and a micro-pipette is used to dispense the required volumes. Some common mistakes can occur such as, leaving out the antibody and allowing it to reach room temperature or not stirring/mixing the antibody before doing the dilution. Sometimes the antibody can settle/precipitate, so mixing should also occur once diluted and before being placed on an instrument.