This is easily the most complicated process performed in the immunohistochemistry (IHC) lab at Caris Lifesciences. All of the quality control that is done in the lab is dependent on the TMA. So without these cutting and staining well, the lab comes to a standstill and repeats have to be performed on a large number of tests. This delays production and costs enormous amounts of money. The TMA production was my primary responsibility at Caris. I also developed a method to save the company between 100-350k on bulk tissue costs by implementing a shallower tissue punch in the block.

I can’t go into too fine of detail on the process, but I’m quite familiar with how these are made. I’ve written the complete standard operating procedure (SOP) on this process, and many other processes, for Caris Lifesciences.
The outline of the process for making TMAs is as follows: bulk tissue purchasing, bulk tissue cutting, quality analysis/positive staining, block marking, TMA blank block production, tissue punching, and lastly, quality control.
Bulk Tissue Purchasing
It’s incredibly hard to find a reliable source(s) for tissue and the distribution/purchasing of such tissue is sort of in a legally gray area. The tissue we receive must stain positive, dependent upon tissue type, for the immunohistochemical (IHC) stains we are performing on patient tissue. So this means we need human tissue that has tumor in it. Thankfully the process we have implemented uses the least amount of tissue as possible to maximize the usability of the bulk tissue blocks.

Bulk Tissue Cutting
After the bulk tissue blocks are received, each has to be sorted into tissue types and then the tissue types that are going to be punched in to the TMA have to be cut on the microtome. One section for each stain it is suppose to stain positive for must be cut. For some of the tissue types such as HER2 positive breast tissue, only needed one slide cut, but for others, as many as 11 slides per block had to be cut.
Bulk Tissue Quality Analysis
Each block has to stain positive for each of the stains it is going to be used as a positive control on. So for each block, the IHC slides must be looked at closely to make sure uniform staining has occurred and it is staining the right sections of tissue. These IHC tests usually stain a certain tissue type the best such as epethilial, nerve, capillary wall, mucousal, etc cells. During the tissue validation phase, all the different tissue types are stained with all of our stains and then a pathologist looks at them to determine which ones they want for positive controls.

As part of the quality analysis of the tissue, once determined that that tissue block is suitable for use in the TMA, the stained slides are then each marked to highlight the area we are interested in punching. These punches go into the blank TMA blocks to make the cutable TMA.
Block Marking
After we’ve determined that the block has stained positive for all of the tests it needs to, the positive portions are marked on the coverslip of the glass slide. These marked slides are then overlaid on the block and used to mark the tissue in the block with a statmark pen.
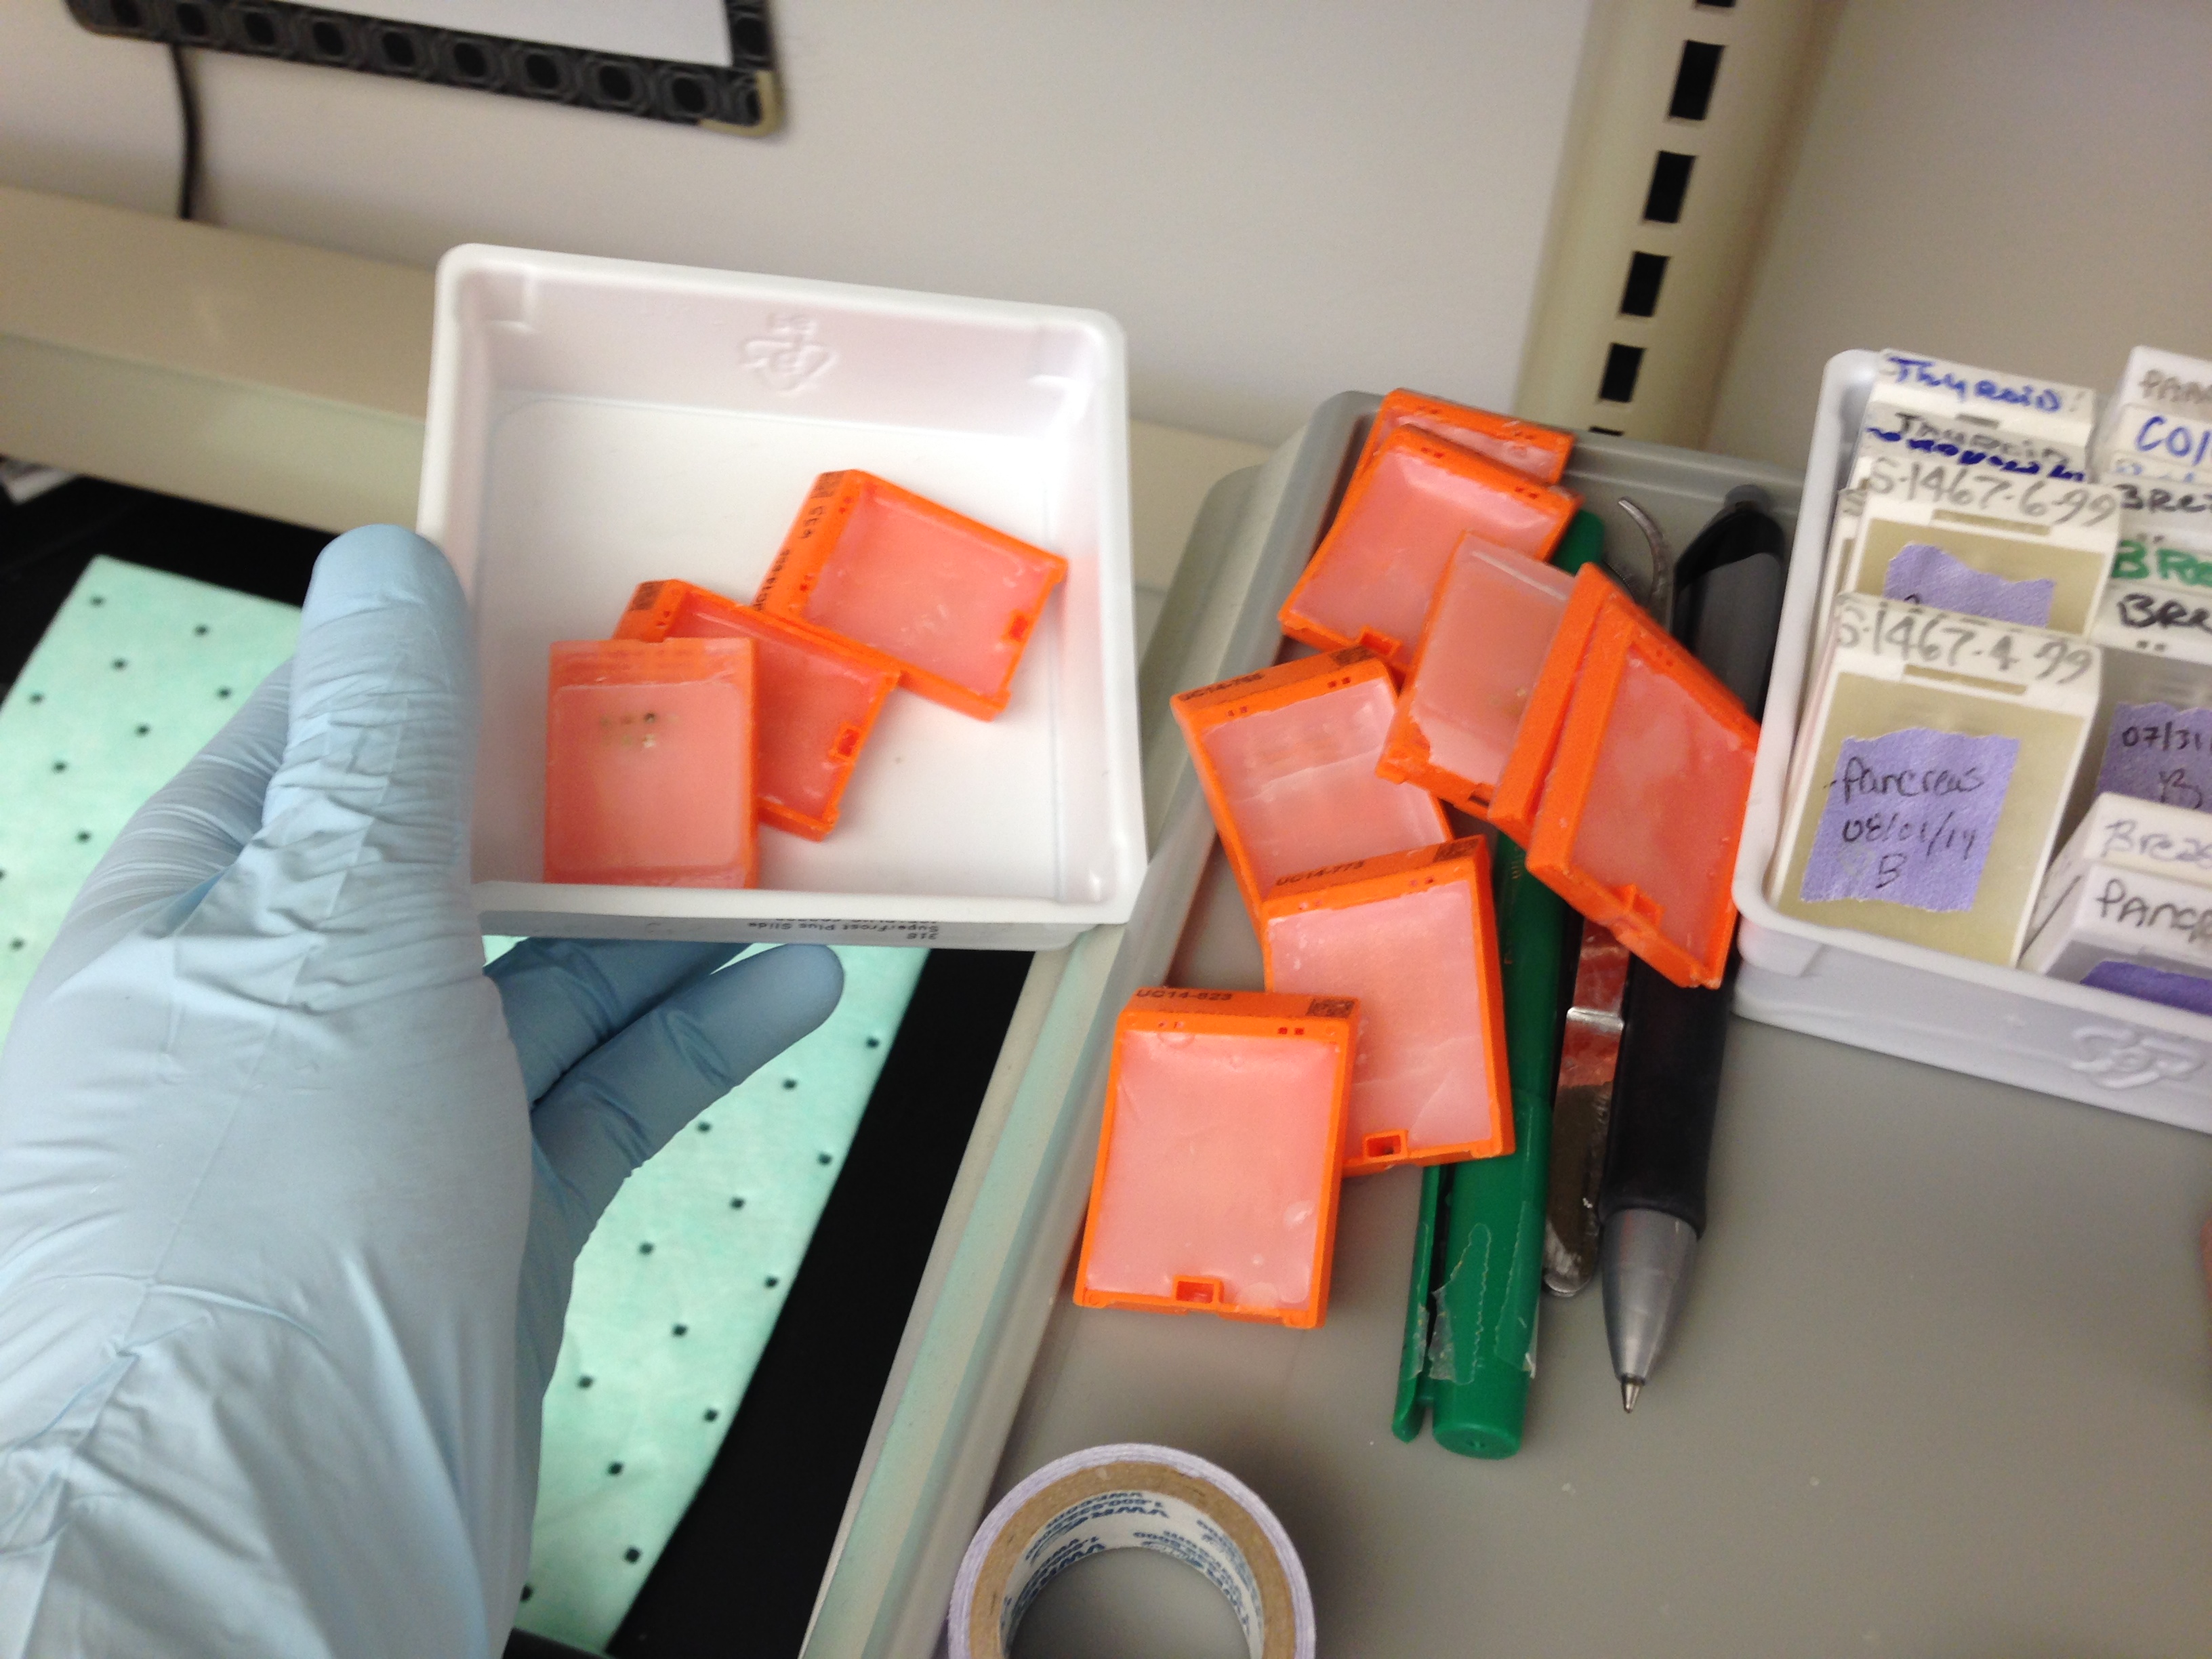
TMA Blank Block Production
Now that there are a lot of blocks marked of each tissue type that is going to go into the TMA, we need to make TMA blank blocks to put the punched tissue into. Depending on the size of the punches and the number of punches for the TMA, a mold size is chosen. Plastic cassettes, generally of a different color than the patient specimen color, are printed out and placed on top of each mold. Paraffin is poured in the mold and then the perfect amount of paraffin needs to remain in the back of the plastic cassette. Without the paraffin backing the cassette, it’s really easy for the portion in the mold to fall off when cutting the cassette or punching through the plastic cassette when making the TMAs.
Tissue Punching

During this step a predefined set of coordinates is used to punch certain tissue types into certain areas of the block. To streamline the punching process, I would set the instrument to the first coordinate and recipient-punch all the blank TMA blocks at that location. Line those up, usually 10 at a time, and then use the bulk tissue blocks and donor-punch them set aside the cores on a cutting board. To prepare the cores for the blank TMA blocks, the paraffin on the bottom has to be sliced off using a scalpel. The tissue is then stacked in the hole on the donor block (blank TMA block). The whole process then repeats itself for each coordinate.
Quality Control of the Finished TMA Block
Once a block has been fully completed, through trial and error, we figured out that baking the blocks for a set amount of time helped embed the tissue cores in the paraffin a little better. Most TMA blocks have problems with the tissue cores being pulled out by the blade during microtomy.
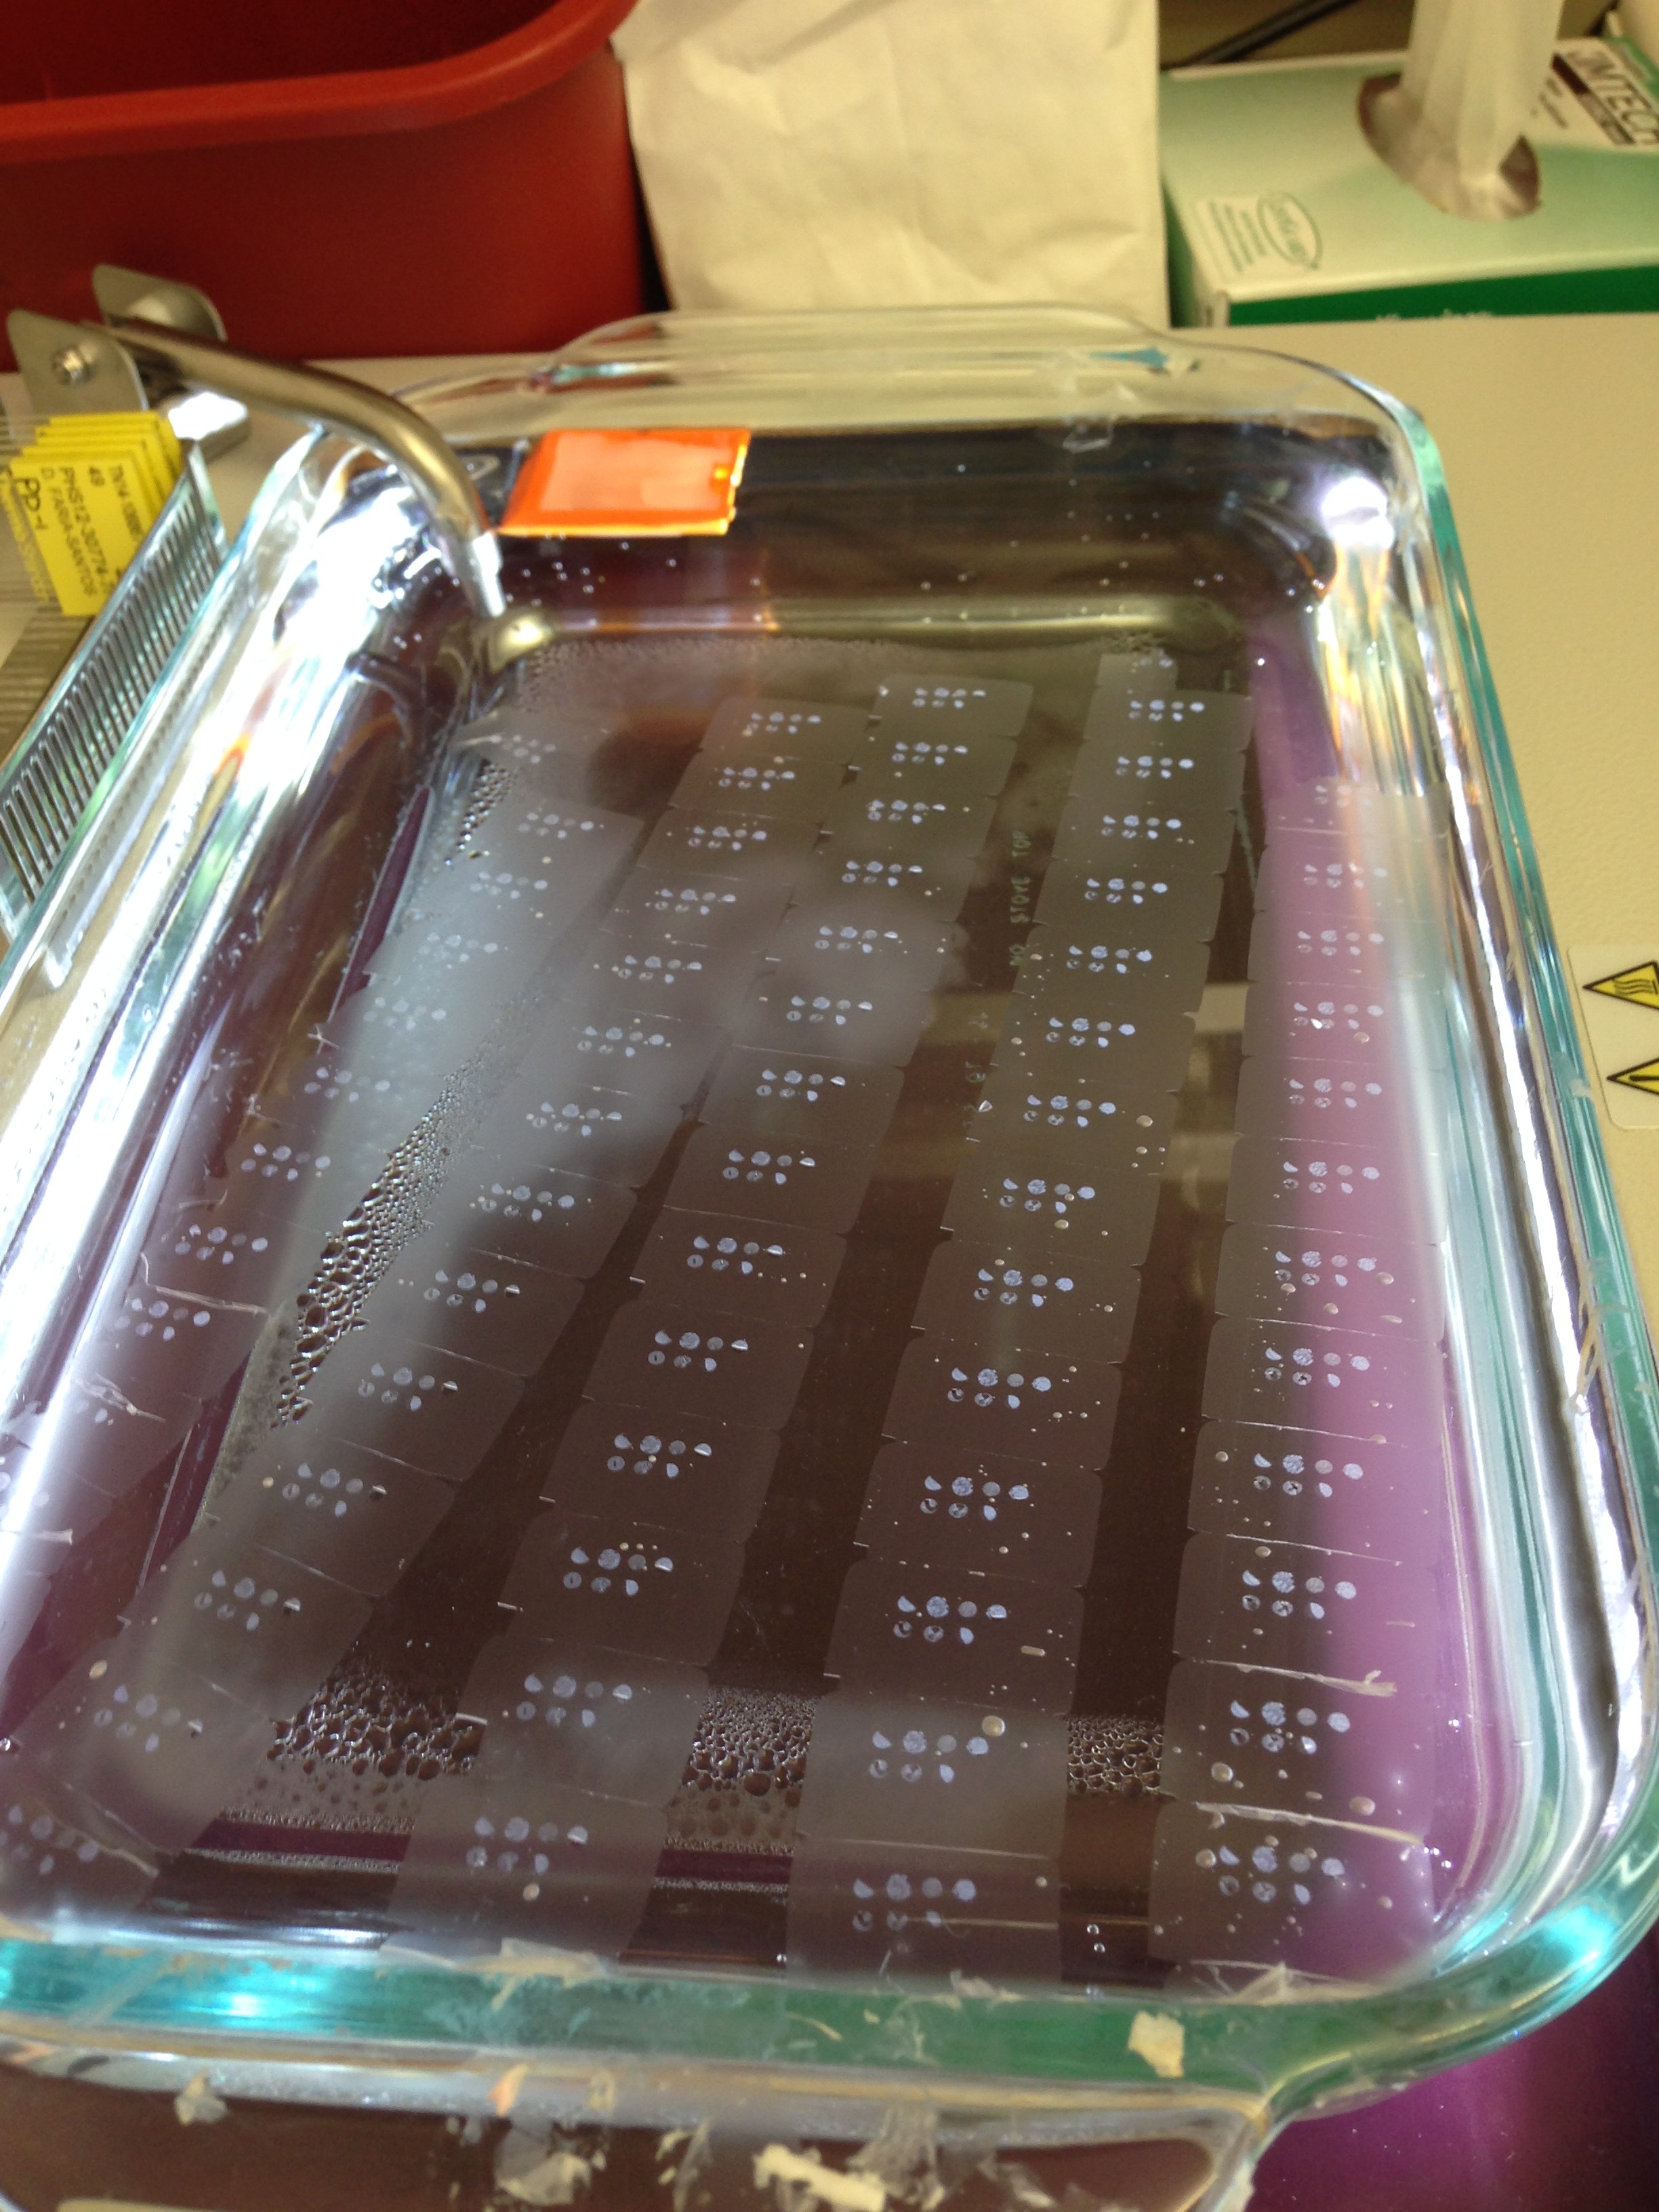
Once they are cooled a couple sections are cut off each and they are stained H&E to look for the correct cell morphology in each core, and then put them into production. Each microtomist gets a block and uses it to cut a section on each slide that already contains patient tissue and that is also going to be stained one of the IHC stains we did at Caris.