Quality Analysis and Quality Control of IHC Stains

At Caris Lifesciences, all of the stained slides went through a quality control process before they were able to leave the laboratory. Once out of the lab, they were looked at by a pathologist who put together a recommended treatment plan for rare and hard to treat cancers. They used a combination of immunohistochemical (IHC) stained slides, a molecular profile, and a comprehensive database of patient treatment. All of this was done in house, which helped Caris shine from the rest of the theragnostic labs.

As I progressed as a histotech, I learned more and more about looking at slides and stains to determine if things stained properly. I received training from pathologists, coworkers, and supervisors. If I had a question on a stain, I would always get the best answer I could from a supervisor. It was  painstaking to learn it all, but it really helped me develop and understand and knowledge base of the stains we performed and also what a lot of tissue looks like under a microscope.

quality control and analysis using H&E
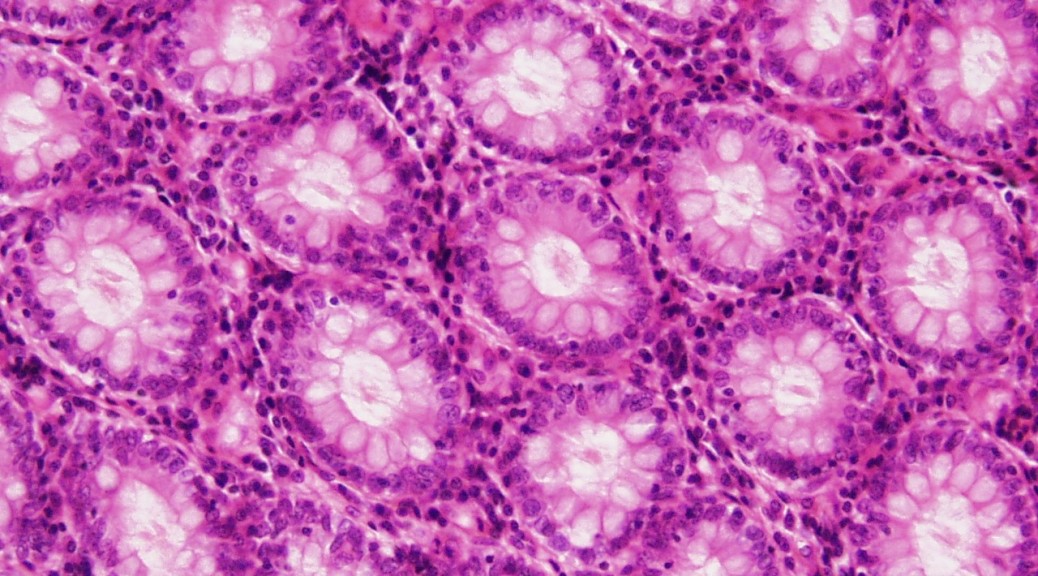
This is a hematoxylin and eosin, or H&E stained slide. These are the bread and butter of histology. Most diagnostics start here. This is a section of colon.

The majority of what I learned was developed when I was making tissue micro-arrays (TMA). Please see the section I’ve devoted to TMAs.

quality control and analysis TMA
This is a very large tissue micro-array

Quality control for the automated stainers (Ventana and Dako) consisted of looking at the TMA section placed on each slide. These act as positive controls for the stains. Several different tissue types were present that were know to stain positive for all of the stains. I was in charge of selecting tissue and passing the tissue by sectioning and staining each tissue type for all of the stains it was supposed to stain positive for. This was step one of the quality control process.

quality control and analysis HER2
This is a HER2 positive stain on breast tissue. It’s one of the prettiest stains resembling a stained glass window.

The final step before the slides were delivered to a pathologist was the QC stage. Someone would sit and look at the TMAs on each slide and also the tissue to make sure that it didn’t fall off and had a uniform stain. Sometimes in microtomy a section can be placed on a slide that is thick on one side and thin on the other, or had chatter or other anomalies. Once this was done, the case was logged and sent out of the lab. I spent a lot of days at the QC station. It was always a nice change of pace from the frustrating microtomy or monotonous staining procedures. It was fascinating to see all the different types of tumors and stains.

Polymerase Chain Reaction

When I was attending college we practiced this process in the laboratory. I thought it was quite intriguing the way the polymerase could just pick up floating genetic material and amplify the DNA through a series of heating a cooling steps.

I’ve never had the opportunity to employ it in a work setting, but we did quite a bit of it when I was in the molecular biology laboratory and also when we were extracting liverwort DNA.

Microtomy: Sectioning Tissue at 4 micron

The staple of the histology lab is microtomy of formalin fixed paraffin embedded (FFPE) blocks.  The microtomes and our process at Caris Lifesciences were all validated for 4μ thick sections, so all of my experience is cutting sections that thin. Frozen microtomy uses thicker sections, and some test require thicker sections to work, but we’ve found that 4μ are about one cell thickness. This allows for great visual representation of protein expression in cancer cells after our IHC staining process.

Microtomy can easily be the most frustrating thing to do in the laboratory. It only becomes so if the tissue is processed incorrectly, which a lot of the tissue I’ve sectioned has been poorly processed. There is a special window of just enough water in the tissue. Too much and it cuts poorly, and too little it just turns into powder or hardens to the point of ruining blades. Improperly decalcified bone specimens are also a bear to cut. Usually you just get what you can with those.

The process we used when doing microtomy is a bath full of heated water and ice blocks. The block goes on the ice first and then the microtome. The microtome chuck is then lined up to the face of the paraffin block and the first initial sections are cut. This is called facing the block. Depending on how that went, you would then either set the block back on the ice, or in the warm water bath.

A ribbon formed on a microtome which is then moved to a warm water bath and then each section is picked up on a glass slide

After the initial facing of the block, you try to get a good ribbon going where each slice connects to the other due to the friction of the tissue and paraffin sliding off the blade. This ribbon is transported very careful to the warm water bath where the paraffin becomes clear. Each segment of the ribbon is teased apart using forceps, and then gently moved and picked up with a glass slide. The slides then go in a drying rack and then into ovens to bake the tissue on the slides.

microtomy
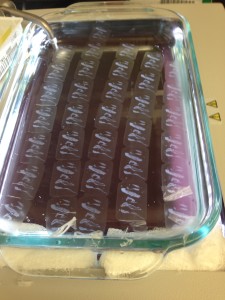
Sections laid out on a warm water bath

Once the slides are baked, the tissue has adhered quite well to positively charged glass slides. At this point, the tissue is ready for all the testing it’s going to be enduring. Some processes require a nuclear fast red to make the tumor area pop out, and then the tumor is scraped off the slide under a dissection scope. The powder then runs through an assay to get the DNA/RNA into well plates for molecular analysis. The IHC lab I worked in ran a lot of IHC tests on each case. All of this work would be impossible without the use of microtomy.

I’m familiar with the Leica 2235 and  2255 microtomes. The first is a manual microtome, and the second is an automated one with a foot pedal. I have yet to see anyone use the automation feature on those microtomes. I don’t prefer one over the other, they both cut excellently.

The Leica 2255 automated microtome
The Leica 2235 manual microtome

Microscope: Compound and Dissecting

I’ve spent a lot of time in front of a microscope either chasing around a micro invertebrate to analyzing a histological stain for Q/A. During lab courses in school I was always the one person that was good at following around single celled organisms so everyone could get a glimpse at it.

When working at the Desert Studies Center, Zzyzx, CA on the Mohave Tui Chub project, I spent huge amounts of time in front of a stereo dissecting microscope counting zooplankton. It was very tedious work, but a really fun way to explore a world invisible to the naked eye.

microscope
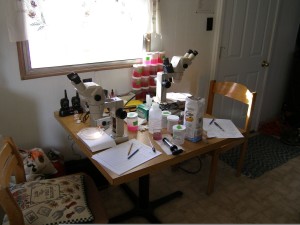
This is the setup I used for counting zooplankton through a stereo dissecting scope

At Caris Lifesciences, working in the immunohistochemistry (IHC) lab required immense amounts of microscopy work. We had really nice stereo compound microscopes that every single slide went through. When I was making tissue micro-arrays (TMA) I had to quality control (QC) all kinds of tissue to make sure they would work for use in the TMA.  I also spent a lot of time looking at each of our IHC stains to make sure they stained properly and the stainer machines were still staining with the intensity we were looking for. In order for a slide to leave the lab and get in front of a pathologist, it had to go through our internal quality analysis (Q/A) team.


Laboratory Information System (LIS)

The laboratory information system (LIS) is a system used in a laboratory to track everything that happens in a lab. Most companies use a combination of paper and electronic logs to track everything from specimen arrival to machine maintenance. Storing the information of what happened to a specimen as it goes through the lab is not only essential, but are required by most laboratory accreditation organizations.

While I worked for Caris Lifesciences, every single thing we did in the lab was tracked via LIS, MS Sharepoint, or by pen and paper logs. This was key to being able to find cases if there were problems at any point during the process. Dutiful use of these systems provide many audit points to make sure nothing is lost in the process, and if something does go missing, this provides a great starting point to finding it. There are also many points during the process that mistakes in labeling or specimen handling can be caught before they become a problem.

Another product of using a system that tracks everything is that you get to run statistics on how the process is working. This can allow further refinements to streamline efficiency. With all that data at your disposal significant findings can be found by data mining.

Gross Dissection

Gross dissection covers a wide variety of tasks that are performed in medical labs which ranges from removal of surgical samples from a patient to slicing up a needle core biopsy. When I was working for an oncology lab, the dissection I routinely performed was on small surgical samples that arrived in formalin.

The lab I worked in received samples from all over the world. Sometimes they came from a hospital that had a tissue processor and an embedding station. These tissue samples were already in a paraffin cassette and required nothing further in preparation of microtomy. Some of the odder samples we received were processed tissue in a square block of paraffin, large pre-cut tissue (for larger plastic cassettes), and whole organs or huge amounts of fatty tissue in large formalin vials.

We received tissue in this style of vial filled with 30:1 formalin to tissue ratio

Gross dissection is really the first thing that needs to occur to a tissue sample before we can process it through the lab. Without the tissue going through a tissue processor, which removes most of the water out of the sample, we can not cut it up or run any tests on it. So, I volunteered to be the person that came in on the weekends to gross the surgical samples we received.

The first step is looking at the pathology report to determine what part of the body the tissue came from. This information may help us determine how to section the tissue if it is too large to fit in one of our paraffin molds. The next step is measuring the dimensions of the tissue and determining where the tumor is. The major idea behind gross dissection for our purposes, is to expose the largest area possible so we have a lot of tissue to look over during the immunohistochemical (IHC) tests.  The last step is determining if it needs to be bisected, trisected, loafed, or many other forms of further cutting.

The tissue goes in the center of the plastic cassette and the lid is then closed to prepare the sample for tissue processing

During the measuring and cutting process, we had to take extremely detailed notes on what color the tissue was, it’s dimensions, all the personal identifying writing on the formalin vial, and how it was cut and placed in x number of plastic cassettes. Once those notes were good, we would place all of our tissue cassettes into a tissue processor, dry out the tissue, and then embed it in paraffin using the right sized mold for the tissue. Most modern day labs all use formalin fixed paraffin embedded (FFPE) blocks for microtomy. It’s really the industry standard, and it is what I have the most experience with.

This is what a typical plastic cassette with processed tissue embedded in paraffin looks like

Gel Electrophoresis

I took a molecular biology course when I was attending Minnesota State University: Moorhead (MSUM). It was the first course I took that required extensive laboratory time. I was a great introduction to some of the common laboratory techniques including gel electrophoresis.

Gel Electrophoresis
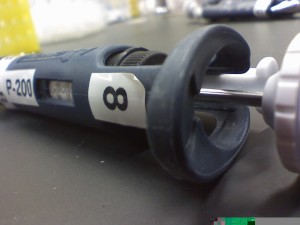
A micro pipette

We went through all the steps from making agarose to micro pipetting a ladder into the wells. We ran a lot of assays and were required to take extensive notes. It was a really great experience, and my favorite laboratory course I’ve taken.

Gel Electrophoresis
Filling the wells of a gel paying very close attention to not puncture the agarose with the very pointy tip of the micro pipette

To make the agarose we measured out gelatin powder mixed it with water and microwaved it. This acts as the matrix for which the DNA must travel. The matrix slows down larger sections first, and those bands show up closer to the wells, while the shorter snippets travel further down the agarose matrix. Once the gel is made, it’s placed in a device that electrifies the gels which draws the DNA through the gel (see image above).

Gel Electrophoresis
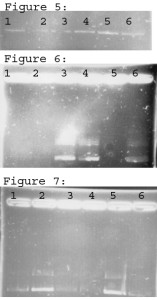
Sometimes things don’t go as well as planned and need to be rerun, which I imagine was the case with this experiment

Most of the assays we performed required that we test it by running a gel and photographing it and running analysis based on how it fluoresced. This was essential when we were running PCR (polymerase chain reaction) to amplify snippets of DNA to make sure we amplified the section we were seeking.

Gel Electrophoresis
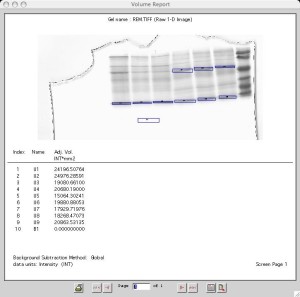
Here you can see an analysis of strand length based on the ladder, which is the dark bands on the right hand side of the image


Ethanol Reformation to Hydrogen

When I was working at the Environment and Energy Research Center (EERC) on the hydrogen fuel cell feasibility study, I was given the opportunity to make a few extra bucks helping out a lab scientist. He was studying different catalyst materials to see how efficiently they would reform ethanol into hydrogen.

My primary function was data entry, but I was present for much of the testing. When I was working with him, we used platinum or a platinum alloy. We setup the experiment and recorded the amount of hydrogen and catalyst weight loss at 15 – 30 minute intervals.

One day while we were running the experiment and chatting about places to eat around Grand Forks, our conversation started to drift around and we were laughing a lot and having a really pleasant time. For a time that was great and then we started feeling a bit boozed up, and then we realized it. We had an ethanol leak. We had to evacuate the lab after finding out we had a defective stopper on the ethanol bottle.

DNA Extraction Assay

At MSUM I participated in undergraduate research each semester. This was a great opportunity to do some independent work in the lab and receive credits for working on a project with a professor.

One of the semesters I worked with another student running DNA extraction assays on liverworts. From what I remember, we cleaned the liverworts well, processed the plant material down and then centrifuged with silica beads. I don’t remember the process exactly, but we probably used a kit similar to this one.

We also amplified the DNA we extracted using PCR.

Cytology Specimens for Theragnostic Cancer Treatment

I was always looking at learning how to do new techniques and operate new machinery while I was working at Caris Lifesciences. The projects that take you out of the repetitive daily tasks were what I lived for. Cytology was a great skill to learn.

I was approached about how I would feel about learning how to process fluid specimens during grossing, or cytology. Since this was something new, I wanted to see how it went. We were going to receive all types of bodily fluids, most of them containing blood, but not necessarily always.

The process wasn’t super complicated, but there were a lot more manual steps involved than simply putting tissue in a tissue processor.

It involved pipetting the blood into smaller vials. These vials were then placed in a centrifuge, spun down, and had the supernatant pipetted off the top, and then spun down more to form a pellet.

cytology
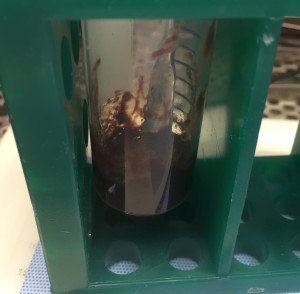
A bloody fluid sample on its way to becoming a pellet in a centrifuge tube

The idea was to get as much of the fluid out as possible. This process continued until a satisfactory pellet was made.

The pellets were then combined and heated agarose gel was added to the cell pellet. The agarose infused cells were then wrapped in lens paper and stuck in the tissue processor to further desiccate the sample. After tissue processing, it was embedded in paraffin and cut on a microtome like any other sample.

cytology
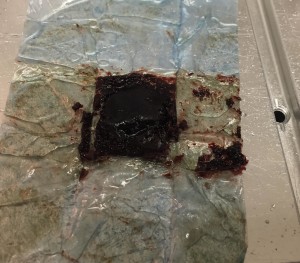
A processed cytological specimen sitting on a hotplate ready for FFPE block construction

With all the steps, these samples could take anywhere from 45 minutes to a few hours depending on the quality of the fluid being sent in. If it wasn’t fresh, it was hard, and if it had formalin in it, more centrifuging was required.

I was the only person, besides the lab director, who was responsible for doing these samples. It was a responsibility I gladly accepted, plus if one of these cytology samples came in on a weekend (which I volunteered to work), I would have to process them anyway. I did so with little supervision or training, but just followed the assay and everything came out well each time. Most of the specimens I handled yielded good molecular data later down the process line.

Learning Through Life